Sunday, 22 March 2015

Growing up fast and 10 already


Hello there, yes I am back again and I quite cant believe myself but I have been busy creating a special card for friends granddaughter who's birthday is next month. I do like to get prepared early so I decided to get cracking on with it.

The little girl in question is 10 this year (doesn't time fly) ,really I should say mini young lady as she is growing up so fast and is turning into bonny young lady. With that note I thought I would make her a card that fits her and not go down the babyish route. 

I recently purchased the Making cards magazine and see these free papers and decide this would suit her to the tee. 

I so hope she likes this creation as I have worked so hard to pick a design that would suit her, I will let you know how she likes it next month.


Supplies used 

Crafters Companion Embossalicious Happy
birthday embossing folder
Making cards magazine free papers
MC010415 So chic - MC020415 So chic
MC140415 Fur and feather friends
Grey texture card Papermilldirect
Sentiment type on PC and printed
Ribbon from local haberdashery
Heart button The works
Adhesive red pearls from eBay UK
Spellbinders -petite scalloped circles
Go kreate dies Cutting edge crafts
Uni POSCA White pen 0.7mm
Card blank made with card from Active paper
eBay
Adhesive button - Papermania
Bow created with the glitter girls bow maker

Thank you ever so much for passing by my blog today, please do leave comment so I know you have been by. Be sure to follow me via the follow button, email or bloglovin.

Until next time bye for now 
Keep crafting and smiling 


Saturday, 21 March 2015

Make it crafty DT call

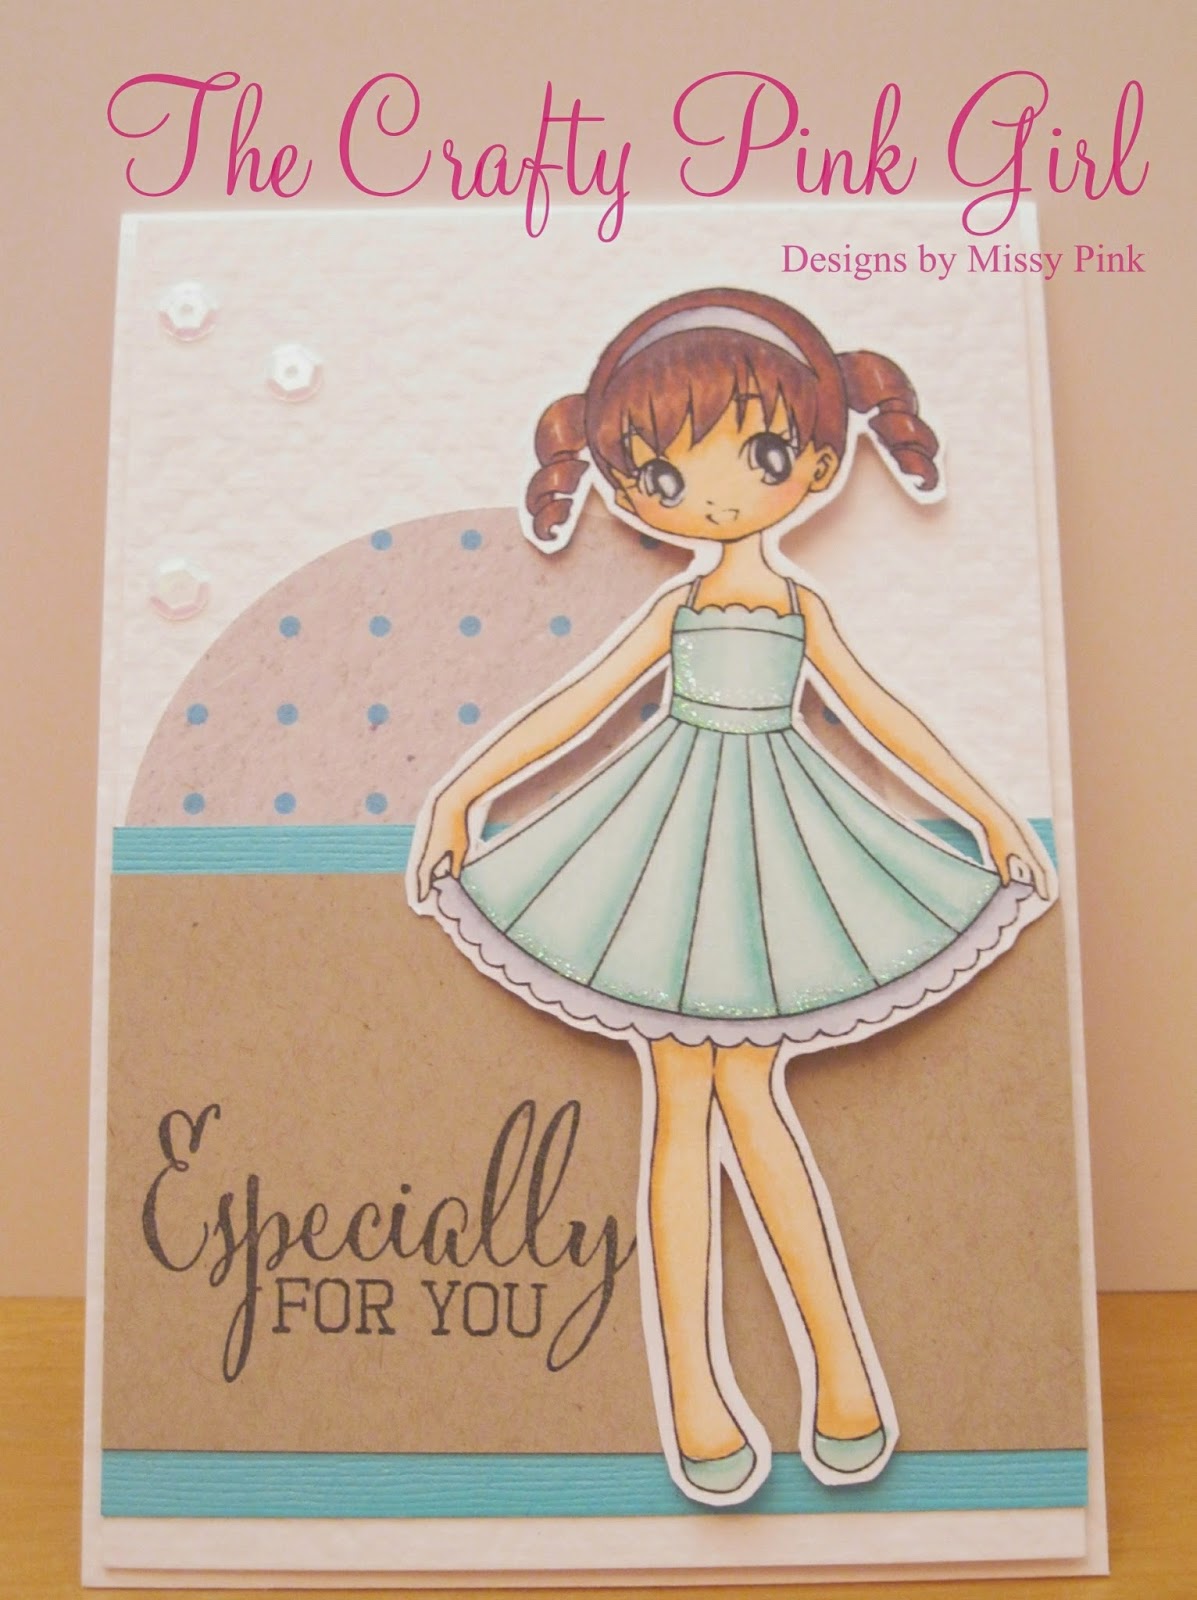
Hello there, as you know I do enjoy colouring and love any excuse to colour in and improve my skills. Well there is design team call at Make it crafty which is online store that sells lots of lovely digi stamps, rubber stamps and chipboard. Zoe is the designer behind this fabulous company and is so talented too.

The moment I spotted the Make it crafty company I was hooked and addicted to they gorgeous designs, So original and sassy and they are very easy to colour in. Which is a bonus as I am still learning my colouring technique and need good quality digi stamps. These are superior quality and I can recommend they print so well. Please do head over there and take a look for yourself - Click here

To apply for the DT call you had to use item from the Make it crafty website and to write blog post, this is my entry for the DT call, I would love to be on the Make it crafty design team as this would be dream.. I would love to be Make it crafty gal! (keeping my fingers crossed)

When I was planning my entry, I thought which design should I use?, well as soon as I seen Mariah, I had to use this image, she so adorable and so sweet.

Coloured in using Spectrum noir alcohol markers - these are the colours used for this project

Skin - TN2 FS2 FS3 Cheek - FS8 FS3 Dress and shoes BT1 BT2 BT4 Dress trim - IG1 IG2 IG4 Hair - TN7 TN8 ED8  Headband - IG1 IG2 IG4 Eyes - True Black and White gel pen.


Size - is 29.5 cm by 10.2cm folded in half 


Make it crafty website site - click Here

Supplies used


Mariah digi stamp from Make it crafty
Dotty paper - Making cards Magazine  MC160315 Sugar
and spice
Clearly besotted Fabulous florals stamps
Sequins - The works
Kraft card - Crafters Companion
Anita’s clear gloss by docrafts
Glitter (Angel whisper) Hunkydory
Hammer card for the card blank
Teal A4 card from Papermilldirect

So hope you have enjoyed visiting by blog today, please do leave me comment so I know you have been by. Don't forget to follow my blog via the follower button ,bloglovin or email.

I will be back shortly with some inspiration to share with all you lovely people, Bye for now until next time.

Keep crafting and smiling


Tuesday, 17 March 2015

Mother's day card


Hello there, its lovely to be back as its been well over a month since I have lasted posted some inspiration, As you may have already notice I have had a bit of revamp and overall of my blog and hope you agree that its much needed improvement. I wanted to create a blog that was inviting and easy on the eye.

In the UK it was Mother's day this Sunday just gone and thought I would share my creation that I made for my Mum. I love to go to town and make a really special card for very special Mum.

I was inspired by the stamped image, reminds me of myself when I was little girl.. on holiday waiting to go to the beach.  


Coloured in using spectrum noir pens - 
Heart - PP3
Skin - FS2 FS3 TN2
Rubber ring / Hat / Sunglasses and Sandals - PP2 PP3 PP4
Hair - TN4 TN5 TN8
Towel / Sun parasol / Ribbon on hat / Glass lens - IB1 IB2 IB3
Dot and trim on swimming costume - CG1  DG2
Swimming costume - FS2 TN2


Supplies used

Background papers from Crafters Companion
issue 4 Magazine CD ROM

Clearly Besotted Stamps - Fabulous Fuchsia

Heart die cuts available from Birds Cards Online - http://www.birdscards.com/free-digital-cut-files/boxes-bags/
Stripe papers from The works
Blue, pink and green card from Rymans
Blank card stock made with Active paper from eBay UK
Ribbon - local haberdashery
Adhesive gems - The works
White flower adhesive button - Papermania
Die cut flower and leaves from Silhouette store
Dolies from Home bargains
Stamped image from Crafty Sentiments designs - Primrose Beach life  -
http://www.craftysentimentsdesigns.co.uk/ourshop/prod_2181565-Primrose-Beach-Life.html


So glad you have visited my blog today and hope you have lovely day. Please do leave me comment so I know you have been by and let me know what you think of my new look blog. As will be making more improvements over the next few months to make its better for all you guys.

Keep crafting and smiling


Sunday, 15 February 2015

Gift box

Well I made some handmade chocolates for my mum and decided to make a lovely box for the chocolates to go in. So I got out my fabulous Crafters Companion Boxer board and set out making this box.

Started with 8 inch square white card (x2 for the top and bottom) from Active Paper (available on eBay UK)
and score 2 1/2 inches on all four sides. 


Items used - coloured card the works  - Lifestyle crafts embossing folders - Cuttlebug kids alphabet die set 

Thank you for passing by my blog today and hope you visit again soon. Don't forget to follow my blog via the Follow button on right hand side of this blog post,

Bye for now - keep crafting and smiling


Saturday, 7 February 2015

With love from Bebunni

Well another crafting make to bring you today, I am trying to push myself a little and try new layouts and think this one works just perfect. Even managed to get out my Spectrum noir pens to create this card.. I so love my Spectrum Noir pens as their colour is so rich and deep and excellent value for money. I am still only learning at the moment and want to keep up with my practising so I can improve further.

I am currently loving glitter card stock... doesn't everyone? well it puts a smile on my face anyway, life is to short not to have glitter in your life.

Spectrum noir pens used - Body HB2 HB3 LV1 Tummy and Flower -FS4 FS5 FS8 - Stem DG1 LG2 - Outline IG2
Crafters Companion UK items used - Bebunni Happy Birthday stamp - Free embossing folder from Crafters Companion Magazine - Neenah solar white card.

Challenges this will be entered from - 


The purple card was embossed twice with cuttlebug dots embossing folders and then I used lifestyle crafts embossing folder for a different look and sanded over to see the white core.. Which I think works really well. 


Other items used are - Glitter card from Quality save - Lifestyle crafters embossing folders - Cuttlebug dots embossing folders -Buttons ,Pinky purple , Purple card, peachy pink card from the The works - Sequins - Spellbinders blossom dies. 

Thank you so much for passing by my blog today, please do make sure you follow my blog via the follow button on right hand side of this blog, to be sure of all the latest news and happenings.

Bye for now - Keep crafting and smiling 

Wednesday, 4 February 2015

Basic shape and Text Inkscape Tutorial - Fabulous with the cameo or other well known cutting files


Hello my friends and followers, today's blog post is tutorial using an amazing little piece of FREE software called Inkscape - Click Here (for this fabulous software) so so easy to download and only takes a few minutes.. Please do give it ago.. you will be amazed at what you can achieve. Designing your very own cutting files is one of major advances of this software plus it as many more.


This will be the screen you will see once the software as downloaded and install, please do not be frighten at all icons, its all quite easy when you know the little tricks

A quick and simple over view of the the screen layout 
LEFT SIDE OF SCREEN - This is for the important bits. like how to form shapes such as squares and circles

RIGHT SIDE OF THE SCREEN - Is for all the household stuff like copy, paste, undo plus many more

TOP BAR - General settings like changing the size, file and edit

BOTTOM BAR - Is the colours you can use for your designs 


Before you start designing I will mention a important tip - Always between each step make sure you click little (BLACK) arrow key on left hand side of the screen (its the first icon on the list) this is to deselect text or shape.


Now using the two icons I have marked above - click the circle icon and hold down CTRL key at the same time - (this is to stop the shape getting misshape) using the your mouse to make the circle the size you require. (Any size you like - its important to practice first) 
Then using the (A) icon, which is the text icon - write the word you require.
If you require to change the font, size or character spacing go to the area I have marked for you, I would like to mention a chunky or swirly font does work really well. 
To make your letters join together (weld) you use the same area marked below and you will see several boxes, that look like different A's and we want the second box which is the AA icon and using the increasing or decrease to weld the words together. 

I generally use black and white for designing as its so much easier, but you are most welcome to use any of the colours you want. 

Now you need to put the text into the shape, making sure you select the text and move it over to shape you have designed.
Always try to make sure you slightly zoom in so you can see the text really well, and you can make the text bigger or smaller depending on the design and I always make sure that the design is attached in two or three places - so when its cut it attaches correctly.   

Next make sure you have (LINE AND FILL) to do that you go to the little box on bottom bar marked with X and double click to get the LINE AND FILL pops up in a box on right hand corner. Click both LINE and select first box and FILL you do the same.

Now you need to group them together - make a box around both the text and shape, click object (top bar) drop down and find GROUP and click on group. Now they should be attached.


Now you have a shape and text that you can make into cutting file, I tend to add rectangle around the design, but for this I am showing you the basics.
Now how to save design - Click file (top bar) then go to save as and box will appear for where you want to save it to - Using (usually) drop down menu you want to save this as PNG but it will say CAIRO PNG (which is the same) THEN click save If you have the designer edition of Silhouette software you should have to do this. (Or any other cutting machine that can work with SVG)

Then you open the Silhouette Cameo and trace the shape as you would do normally then cut the design you have designed.

I hope you have found this tutorial of some help to you and its inspired you to use this wonderful piece of software. I am hoping to bring you more of this tutorials over the coming months.

Thank you for passing by my blog today, please do follow my blog via the follow button on the right hand side of this post or leave me comment so I know you have been by.

Bye for now, keep crafting and smiling 


Wednesday, 28 January 2015

A special birthday calls for special card

Well its was my Mum's birthday yesterday, a very special birthday indeed.. A 65th birthday calls for a extra special card for sure. 
My mum absolutely loved the finished card and said it was the best card she had received, 
I created this card using my fabulous Silhouette cameo (of course) where would I be without this fabulously clever machine..    


Items used to create this card were - 
Red card and pattern papers from The works, Die cut topper was cut on Silhouette cameo, Element was purchase from Silhouette store, Glitter card from the works, adhesive gems and the cupcakes were created using Kanban clear stamps. It was coloured in using coloured pencils and the baby oil technique.

So hope you have enjoyed your visit to my blog today and given you some crafty inspiration.
 Until next time, keep crafting and smiling.


Saturday, 10 January 2015

Bright and colourful with Some Odd Girl


From the moment I found Some odd girl stamps, I totally fell for them and love they quirky and sassy style and totally fresh and different. Please head over to their brand new website - Click Here and you will too fall in love with their gorgeous stamps, Kristy who is the owner and designer of Some Odd Girl is amazingly talented and comes up with most amazing ideas.

Currently I only have two sets of Some Odd girl stamps, but I am hoping to add more to my collection when I can.

Coloured in using Spectrum noir pens - these are the colours I used
Skin - FS2 FS3 TN2
Cheeks - FS6 FS2
Hair - PP5 PP4 PP2
Jacket - IB1 IB2
Hat shade IG1 IG4 (Paper piece hat with background paper)
Tshirt and coffee cup - CT2 CT3 CT4
Bag and Tongue - PP5 PP2
Outline - IG1


Items used - Hipster Mae Some Odd Girl stamps - Sequins - Yellow glitter card from Quality save - Blue, Yellow, dark pink card from the works 

Background was designed myself using Serif Craft Artist and I also designed the circle bubble template (made with Silhouette cameo) and link with Distress ink - Tattered rose - sentiment from Hot of the press stamps - Die cut ~ Spellbinders - Flower cut from Fiskars punch 

So hope you enjoyed passing by my blog today, please do follow my blog via the follow button on right hand side of this blog post.

Until next time, keep crafting and smiling.