Showing posts with label Spectrum noir. Show all posts

Saturday, 19 March 2016

DIY Alcohol Marker Storage On Budget


Hello all, well I'm back today to share with you my DIY alcohol marker storage on budget, we all have these markers in our craft stash and I am lucky to have full set of Spectrum Noir pens, but as you can imagine it's not exactly easy to store them. I'd been storing them originally in three cardboard shoe boxes, but it was really taking up to much space within my craft space, as I don't currently have a room that is just for crafting, mine is bedroom that is also craft area. So I need things that a space saving, I'd done my research for marker storage online to buy, but just couldn't get my budget to stretch. So I set about looking for alternative that would suit my budget.  


The idea came to me when I was looking for inexpensive storage box for tidying my craft space and had one of those lightbulb moments (yay!) that I could took turn one of these boxes into my very own marker storage. So I decided to purchase one and see if it would work, even better the box only costed £5 so I was so please, even if it didn't work it would not of been wasted as I could use it for storage purposes.  


I thought to myself how am I going to create the shelves, mmmm I thought, this is gonna be tricky a one!!. But yet again I'd had another light bulb moment to use Amazon packaging, we had have tons of these boxes hanging around or ready to be recycled (from craft purchase's lol). So I cut down several pieces of the packaging to fit inside the box, and affixed them in place with re-forced tape, as this is slightly stronger tape which you need for something like this.       


I worked out that thirteen markers would comfortably fitted across, So got out my calculator (as I'm not the best at maths lol) and worked out I needed thirteen rows of shelves to fit the full set of 168 pens. But I decided to add an extra shelf for luck, so I could house some spare pens and nibs. I still have space too, if the Spectrum Noir markers extend their colour range. 


So from a simple inexpensive storage box into the very handy table top marker storage, that will just sit perfectly on my craft desk and make finding my pen colours a whole lot easier than before. Plus create more space for my other craft stuff, so it's a win win all round!. 


(Click on the images below to purchase the items I've used - I do not use affiliate links)


Thank you so much for passing by today and hope you call by again, the easiest to be kept up to date with my latest posts is to click on the follow button (just to the right of  post) or you can follow by bloglovin and email, you will also find me on social media too. Feel free to leave me comment so I know you have been by. Until next time, keep crafting and smiling.

Wednesday, 7 October 2015

Heartfelt thanks | CB stamps


Hello there, I am back today to show you my latest creation that I made last week 
and thought you would love to see it. It's an ombre design again but this time it's 
done using the fabulous Spectrum noir alcohol marker pens.


First cut a piece of portofino white card down to 29.5 x 10 cm and folded with
bone folder at the top. Take another piece of the same portofino card slightly smaller 
than the card blank. Using chisel tip of the spectrum noir pens I created the ombre
effect using three colours from one colour family. Adhered the matt to card using
 double sided tape.


Using my cuttlebug and go kreate concentric circle large die, I cut circle with PC transfusion vellum, I cut thanks out on Silhouette Cameo using packaging from cardboard boxes and coloured in the thanks with BT4 then heat embossed the thanks using perfect medium and wow EP vanilla sparkle and heat set with heat tool.

Stamped heartfelt with memento tuxedo black ink on white card using CB mini messages set, then 
cut the sentiment down to narrow strip. 


Adhered the thanks to the vellum using zig fine glue pen and attached the vellum to card using
collall 3D glue gel (making sure I applied the glue so it was hidden out the away) adhered the
sentiment with the same collall glue gel. To finish I used Anita's 3D gloss gel to the back of each
sequin using tweezers and attached them onto the card.


Supplies  

(Just click on the highlighted link to purchase the items I've used in this creation)

  • Clearly besotted mini messages available from Clearly Besotted UK
  • Memento tuxedo black ink pad available from Amazon UK
  • Double sided tape from local market
  • Wow embossing powder - Vanilla sparkle available from Stamps by Chloe UK
  • Zig fine glue pen available from Amazon UK
  • Transfusion sparkle vellum - currently unavailable at Paperchase 
  • White portofino card - currently unavailable
  • Anita's clear gloss 3D Glue available from Amazon UK
  • Spectrum noir available from Crafters Companion UK
  • Sequins from Poundworld
  • Heat tool available from Amazon UK
  • Recycled packaging 
  • Perfect medium ink available at Amazon UK
  • Go kreate concentric circles were available from Cutting edge crafts
  • Acrylic block  available from Amazon UK
  • Collall 3D glue gel available from Crafters Companion UK
Spectrum noir pens used - BT1 BT2 BT4


Thank you for visiting my blog today and hope you call by again very soon, please do be
aware you can be kept fully up to date with my latest posts just by clicking the follow
button on the right hand side of this post. Feel free to leave me comment so I know you
have been by. 

Until next time - keep crafting and smiling 


Wednesday, 9 September 2015

Inspired by Dreamees


Hello there, many of you may already know from my previous posts that I'd purchase a Dreamees bundle a while back. So I set about creating something special with it, well this what I came up with and hope you like as much as I do. If you can please do visit the Dreamees website as they have some lovely items and they prices are certainly excellent value.. definitely worth a visit. 


Started with piece of white linen card 280gsm card measuring 28.9cm x 10.1cm folded at the top, Opened my Silhouette software and created rectangle measuring slightly smaller than the card front and made two wave effects using the scissors option. Then made a internal offset to make a stitch effect, using two different pieces of different cardstock I cut the waves using the Silhouette cameo.


Next stamped two Dreamees medium and small flowers from the bundle using Perfect medium and Wow embossing powder Vanilla sparkle on sparkle vellum and heat set it using heat tool then cut these flowers out using scissors. Coloured the back of the flowers with Spectrum noir  LV2. Stamped birthday wishes with versafine onyx black ink and adhered the two wave with double sided foam tape.


Adhered the flowers and sequins to the front of the card using Pinflair glue gel to and applied three adhesive pearls to the centre of the flowers to finish.


Supplies 

(As always I leave you the links to where you can purchase the same items)


  • Heart background card, clear stamps apart of the bundle by Dreamees
  • Purple lavender linen card available at The works
  • Double sided foam tape available at Poundland
  • Sparkle vellum by Paperchase, currently unavailable 
  • Spectrum Noir LV2 available at  Crafters Companion
  • Wow embossing powders Vanilla sparkle designed Chloe Endean available at Chloe's creative crafts
  • Silhouette cameo available from Amazon UK
  • 3 adhesive pearls from local craft shop
  • Pinflair glue gel available from Amazon UK
  • Acrylic block available from Amazon UK
  • White linen card 280 gsm from a local market 
  • Background was printed on Neenah solar white card available at  Crafters Companion
  • Sequins from 99p store
  • Versafine onyx black ink available from Amazon UK

Thank you for visiting my blog today and hope you come back soon, please do be aware you can be kept up to date with my latest posts by clicking on the follow button on right hand side of this blog post, or through Bloglovin or email. Feel free to leave a comment so I know you have been by.

Until next time, keep crafting and smiling 


Monday, 22 June 2015

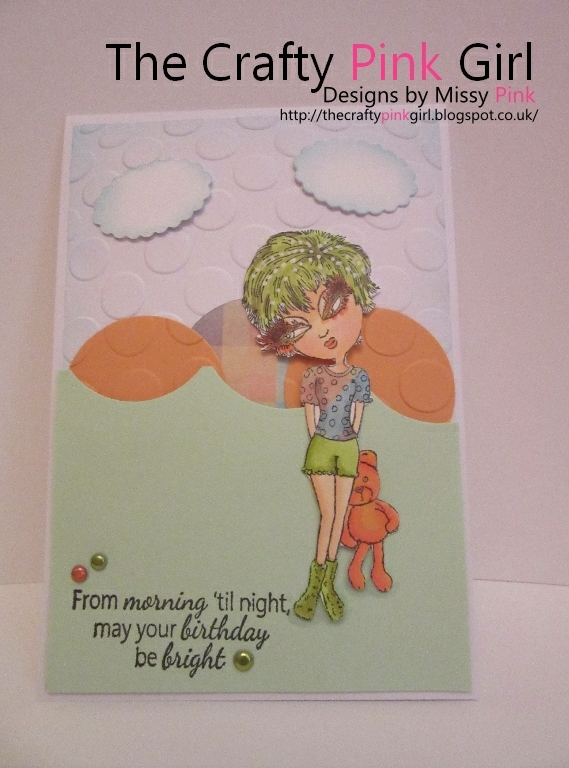
Orange and green with scruffy little cat


Hello there, yes I am back again.. I had quite a few cards I'd made last week and was unavailable to show you lovely people last week, so thought I would let you see what I've created. Earlier in the year I manage to purchase this Scruffy little cat stamp in the Crafters Companion sale, but had not had the chance to play with it..so when I came up with this design, this stamp was simply perfect.

Do head over to Crafters Companion website and take a look at their marvellous goodies, they do have regular offers and discounts throughout the year and worth visit.  

The image was coloured in using Spectrum Noir alcohol markers and these are the colours I used -
Skin FS2 FS3 FS4 - Cheek FS6 - Hair  CG1 CG2 CG3 DG2 DG4 - Shadows IG2 IG3 - Socks CG2 CG3 - Eyelashes / teddy OR1 OR2 OR3


Using the free papers from Making cards magazine, I paper pieced Pixie's top to match the pattern paper in the background, To pull the whole design together and match completely.


Card is 29.2cm x 10.2cm folded at the top


As always there will be listed of places when you can purchase the same items, all you have to do is click on the highlighted link in the box and it will take you straight there.

Supplies 


Scruffy little cat Pixie clear stamp - Crafters Companion
Orange / green card from The works
Blank card from Portofino card
Smooth white card Papercutz
Adhesive dots - Paperchase
Pattern paper from Making Cards Magazine
MC 166415 Fur and feathered friends
Embossing folder - C art us - Cutting edge crafts
Pinflair glue gel - Cutting edge crafts
Uni posca white gel pen - WH smith
Versafine Onyx black ink pad - QVC
Acrylic stamp block - Silhouette cameo   
Go kreate concentric circle dies -  Cutting edge crafts
Desire essentials scalloped oval dies - Crafters Companion
Memento Tuxedo black ink pad - Crafters Companion
Free clear stamp set from issue 6 Crafter's Inspiration magazine -  Crafters Companion
Double sided tape - local market
Oval make sponge for inking the edges


This will be added to these challenges
The paper players challenge
Spectrum noir Facebook Challenge

Thank you for visiting my blog today, I really do hope you have enjoyed your visit and please do call by soon and make sure you follow my blog through the Follow button (on the right hand side of this post) or by email and bloglovin.. That way you will be able to be kept in know on my latest posts. Please do leave me comment so I know you have been by.

Until next time - keep crafting and smiling 


Saturday, 23 May 2015

Ahoy there!!

Hello there, I hope you're having lovely weekend? Well in the UK its a long weekend as its a bank holiday weekend here, so more time for crafting of course!!. I am back again with this creation today that I made using clearly besotted stamps (Ahoy Matey). As many of you will already know I adore CBS as their so modern with such detail and fabulous designs.

I am really enjoying the Clean and Simple (CAS) look at the moment and its given me so many ideas, so I will be bring you more creations very soon.

The ship was coloured in using - Spectrum Noir Alcohol Markers 
IG1 - IG2 - IG4
DR1 - DR3 - DR6  


Card size - 11.5 cm x 27.7 cm  folded in half at the top


As always I leave details of what items I have used in the box below, all you have to is click on the highlighted link and it will take you straight there for where to buy the supplies what I have used,

Supplies 


Clearly besotted - Ahoy Matey stamps
Crafters Companion - Memento tuxedo black ink pad
Matt adhesive gems - Home bargains
(Coloured with markers to go with the card)
Crafters Companion Neenah solar white card
Rymans Black, red card

Thank you ever so much for visiting my blog today and I really do hope you have enjoyed the visit and you come back soon. Please do make sure you follow my blog via the follower button, by bloglovin or by email. 

I will be back soon with more inspiration until next time keep smiling and crafting.


Saturday, 4 April 2015

Did some one say cake?

Hello there, hope you are having lovely Easter break? I been spending the last two days crafting and thought I should share with you my latest creation that I have been working on. My inspiration for this card was that I recently purchased a set of Some odd girl stamps, so just had this need to create something with these amazing stamps. I love Some odd girl stamps and love any chance to do some colouring with these sweet and sassy stamps.


I used Papermania adhesive stones (monochrome) and change the colour of the stone with Spectrum noir pens to match the colour theme of this creation. 


Coloured using - Skin FS2 FS3 TN2 - Hair EB5 GB8 GB10 - Cake PP6 PP5 PP3 - Hat / shoes / skirt BT2 BT4 BT1 - Flame FS2 TN2 - Icing IG4 IG2 IG1 - Outline IG1


This will be added to these challenge(s)

Full details of products used are always added below with the links when you can purchase the items.

Supplies


Crafters Companion Embossalicious
chevrons embossing folders
Quixotic Paperie Some odd girl - big wishes mae
Docrafts Papermania large corner punch
Docrafts Papermania adhesive stones -
monochrome and coloured with
Spectrum Noir pens to match the colour range
Amazon - Die cut and offset circle cut
using the Silhouette Cameo
Black card Rymans
Pink card The works
Pinflair glue gel Cutting edge crafts
Double sided tape - local store
Hunkydory diamond sparkles angel whispers

I hope you enjoy the rest of your Easter holiday and thank you for visiting me today and please leave me message so I know you have been by , please do make sure you follow my blog via the follow button, email or through bloglovin to receive the latest information and posts from me.

Until next time bye for now - keep smiling and crafting

Saturday, 21 March 2015

Make it crafty DT call

Hello there, as you know I do enjoy colouring and love any excuse to colour in and improve my skills. Well there is design team call at Make it crafty which is online store that sells lots of lovely digi stamps, rubber stamps and chipboard. Zoe is the designer behind this fabulous company and is so talented too.

The moment I spotted the Make it crafty company I was hooked and addicted to they gorgeous designs, So original and sassy and they are very easy to colour in. Which is a bonus as I am still learning my colouring technique and need good quality digi stamps. These are superior quality and I can recommend they print so well. Please do head over there and take a look for yourself - Click here

To apply for the DT call you had to use item from the Make it crafty website and to write blog post, this is my entry for the DT call, I would love to be on the Make it crafty design team as this would be dream.. I would love to be Make it crafty gal! (keeping my fingers crossed)

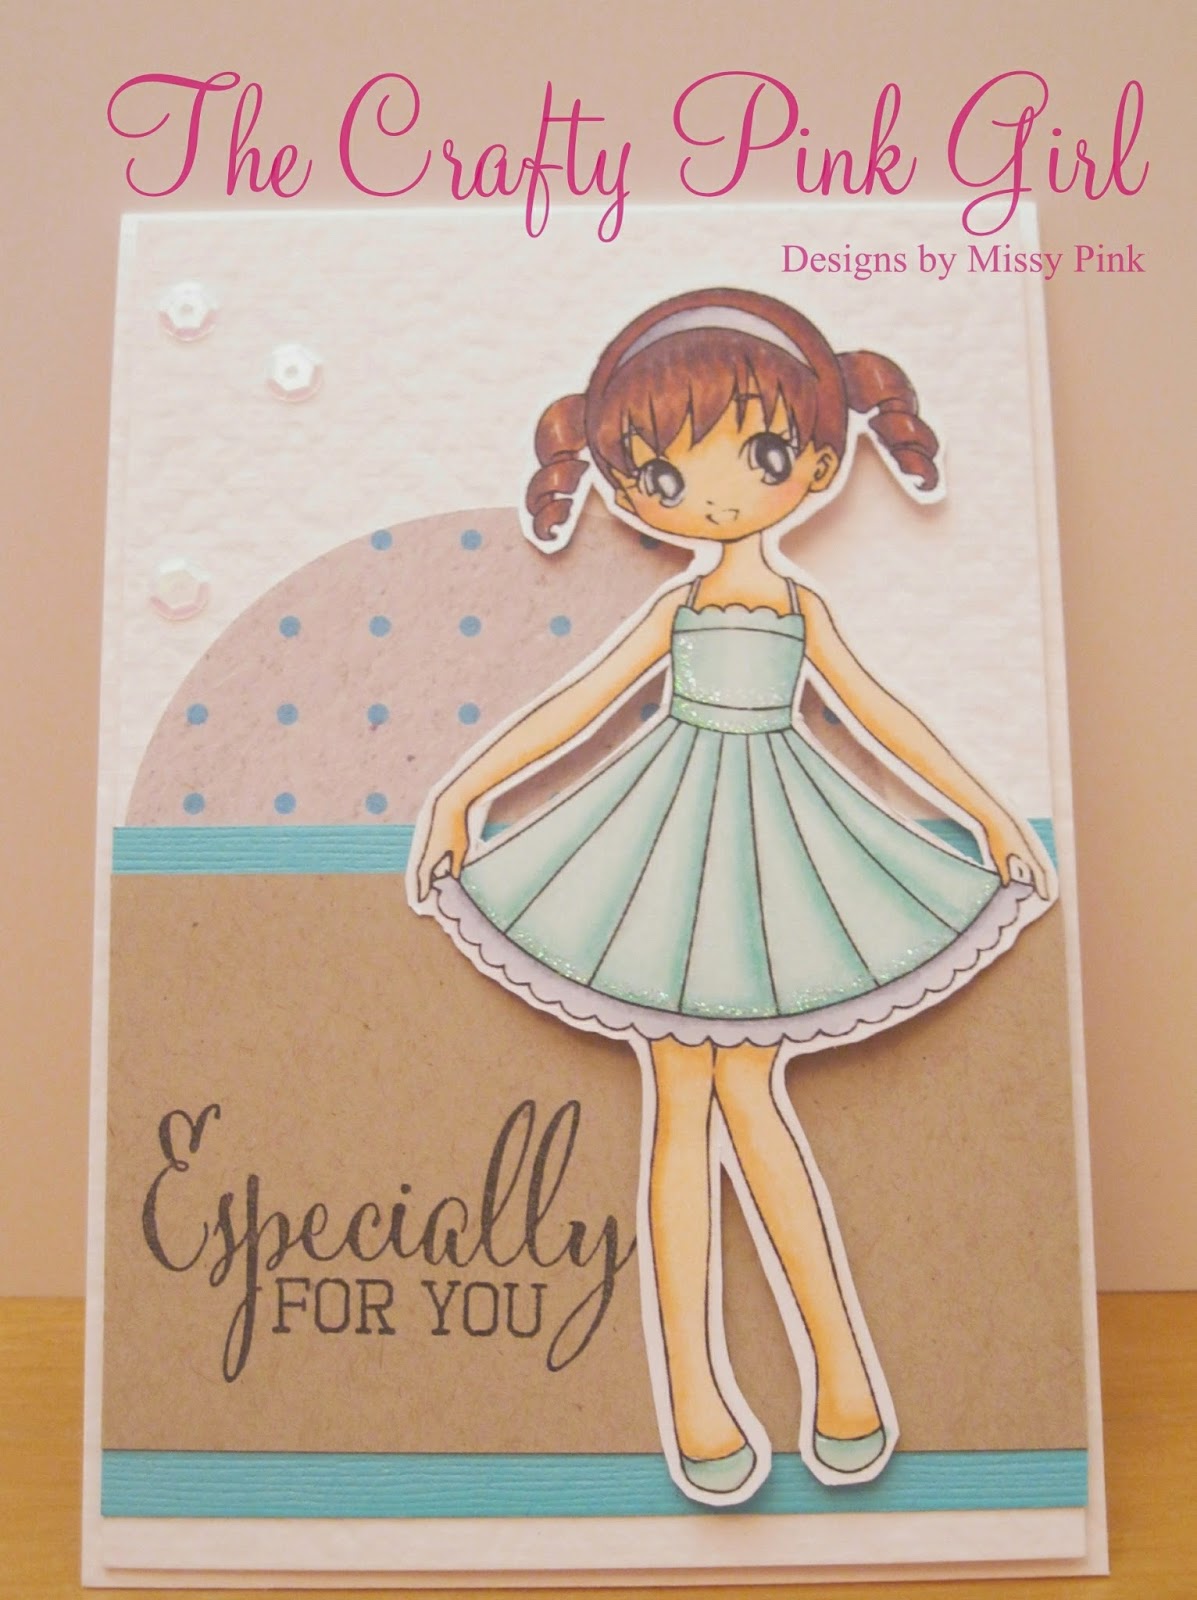
When I was planning my entry, I thought which design should I use?, well as soon as I seen Mariah, I had to use this image, she so adorable and so sweet.

Coloured in using Spectrum noir alcohol markers - these are the colours used for this project

Skin - TN2 FS2 FS3 Cheek - FS8 FS3 Dress and shoes BT1 BT2 BT4 Dress trim - IG1 IG2 IG4 Hair - TN7 TN8 ED8  Headband - IG1 IG2 IG4 Eyes - True Black and White gel pen.


Size - is 29.5 cm by 10.2cm folded in half 


Make it crafty website site - click Here

Supplies used


Mariah digi stamp from Make it crafty
Dotty paper - Making cards Magazine  MC160315 Sugar
and spice
Clearly besotted Fabulous florals stamps
Sequins - The works
Kraft card - Crafters Companion
Anita’s clear gloss by docrafts
Glitter (Angel whisper) Hunkydory
Hammer card for the card blank
Teal A4 card from Papermilldirect

So hope you have enjoyed visiting by blog today, please do leave me comment so I know you have been by. Don't forget to follow my blog via the follower button ,bloglovin or email.

I will be back shortly with some inspiration to share with all you lovely people, Bye for now until next time.

Keep crafting and smiling


Saturday, 7 February 2015

With love from Bebunni

Well another crafting make to bring you today, I am trying to push myself a little and try new layouts and think this one works just perfect. Even managed to get out my Spectrum noir pens to create this card.. I so love my Spectrum Noir pens as their colour is so rich and deep and excellent value for money. I am still only learning at the moment and want to keep up with my practising so I can improve further.

I am currently loving glitter card stock... doesn't everyone? well it puts a smile on my face anyway, life is to short not to have glitter in your life.

Spectrum noir pens used - Body HB2 HB3 LV1 Tummy and Flower -FS4 FS5 FS8 - Stem DG1 LG2 - Outline IG2
Crafters Companion UK items used - Bebunni Happy Birthday stamp - Free embossing folder from Crafters Companion Magazine - Neenah solar white card.

Challenges this will be entered from - 


The purple card was embossed twice with cuttlebug dots embossing folders and then I used lifestyle crafts embossing folder for a different look and sanded over to see the white core.. Which I think works really well. 


Other items used are - Glitter card from Quality save - Lifestyle crafters embossing folders - Cuttlebug dots embossing folders -Buttons ,Pinky purple , Purple card, peachy pink card from the The works - Sequins - Spellbinders blossom dies. 

Thank you so much for passing by my blog today, please do make sure you follow my blog via the follow button on right hand side of this blog, to be sure of all the latest news and happenings.

Bye for now - Keep crafting and smiling