Wednesday 24 February 2016

Discount Collective haul | Budget friendly| inspired by Lindsay Weirich


Hello all, well it's been one of those eventful days,you know where everything that can go wrong does go wrong. So I do hope your day so much better? Has you may know I love bargain and I'm always on the lookout for those bargains out there.  


You may be wondering why I've added four bottles of nail varnish with in this haul, well I've not gone silly....it's just that I've seen a super technique that uses nail varnish and thought i'd give it ago. 
I got a super deal on this wonderful nail varnish, three of them were 80p and one was 50p and all were from Primark <--------- go to the site here ( I just love Primark, it is one of my favourite stores) so I was so glad to get this nail polish for such great price. You may of notice that the photo above as nail polish missing, this is because I when took the photo I forgot I had brought four. I will be sharing the nail varnish technique very soon....so watch this space. 

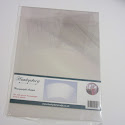
Next two items are from The Works UK <----- go to the site here, this is another favourite store of mine that sells really good quality and value art and craft items for such a fabulous price. So I decided to treat myself to the Crawford and Black cold press watercolor card which was only £3 for 12 sheets, but can you believe mine as 14 sheets instead. Next I picked up 20 soft pastels for £4 which I thought was so reasonable, as you can pay awful lot more.

I really can't wait to try them out as i've not used pastels in years, plus a few weeks ago the awesome Lindsay Weirich <----visit her blog now from the Frugal crafter blog shown us brilliant idea of making your own DIY chalk ink and fixing those loose sponge applicators. Well I just love Lindsay's money saving ideas and I have her to thank for the money I've saved. I highly recommend you take a look at her wonderful blog and informative YouTube videos, I have shared the video below that inspired me to purchase the soft pastels.


(The direct links to where I purchased the items, I do not use affiliate links)


Thank you so much for passing by today, hope you visit my blog very soon, please do follow me via the follower button located on the right of this post or you can follow by email and bloglovin and find me on social media. Feel free to leave a comment so I know you have been by. Until next time keep crafting and smiling.


You may be interested in -

Saturday 20 February 2016

Herd You Had A Birthday | MFT stamps


Hello all, I am back...yes it's been well over a week I know, but I am back now!! towards the end of last year I purchased some My Favourite Things stamps ( Which I love!!) and I've only just got round to having a play and decided to use nearly all the animals on one card...yes it does sound a little crazy and maybe over the top but I think it works. 


Started with A6 (UK) tent fold card, stamped the MFT "The whole herd" using versafine onyx ink and the Homemade stamping tool <----- click here and coloured the images in WHSmith artist quality coloured pencils. I wanted that fun look that had that soft touch, also I blended to blue colours together to go around the edge of each animal, to station them,   


Stamped "Herd You Had A Birthday" sentiment using onyx black ink and again the homemade stamp tool on to strip of neenah card, then poured over clear embossing powder and heat set with heat tool.


Adhered the matt layer to the card using double sided tape and attached the sentiment strip using double sided foam tape. For finished touch I had a little wink of stella clear glitter pen on parts of the animals.  

I thought I'd give you a little product review of the homemade stamping tool that I've recently blogged about, well I can honestly say it works fabulously and gives you super clear stamped images every time. Very pleased with how it turned out and would recommend making one for sure. 


(Click on the links below to go direct where I purchased the items, I do not use affiliate links)


Thank you for passing by today and hope you call by again soon, to be kept fully updated with my latest posts the best way is to be "follower" and you can do this by clicking on the follow button just right of this post, or you can follow by bloglovin and email. I can be found on social media aswell and those links are near the follow button too. Feel free to leave me comment so I know you have been by. Enjoy the rest of your weekend..until next time keep crafting and smiling.


You may be interested in -

Wednesday 10 February 2016

Valentine's | Bebunni


Hello all, well valentine's is almost around the corner, can you believe how fast February has arrived!!  I thought I'd create a card using Bebunni CD ROM that I purchased from Crafters Companion a while ago. Bebunni is certainly the perfect character for the valentine's, he is such cutie pie don't you think?

On with the card itself, started with A6 tent fold card, next I went Bird's Cards <------ Click here (Fabulous website where you can download beautiful cutting files for free, Birds Cards is brilliant resource site to go, when you need that special element to go on your card and they offer a superb angel policy for just personal use.) This one is the Lattice Heart and was cut using a piece of neenah solar white card and the Silhouette cameo machine, making sure I created rectangle shape so the heart stayed in the middle of the card. 


Then using Serif craft artist, I picked out the cute bebunni image from the CD Rom and using the cut out feature in SCA I managed to get the image of bebunni on his own, then created a offset in Silhouette and cut this out. I attached a small piece of acetate on the back of the heart die cut using strong double sided tape and added double sided foam to the top of the acetate to create a shaker card, added a few heart confetti and applied another piece of acetate for the top. Then added a stripe of red card down the left hand side of the card blank, adhere the matt to the card blank using double sided foam tape.      


Now attached bebunni to the middle of the heart and stamped  MFT "I love You" using perfect medium ink and acrylic block and poured wow bright white embossing powder over the top and heat set with a heat tool. Snipped a little arrow into the stripe of card and attached the card using double sided foam pads. For the finished touch I added a little wink of stella clear glitter pen to the heart and added three red sequins using micro glue dots.


(Click on the images below to be taken the place where I purchased the items, I do not use affiliate links) 


Thank you for visiting today, I hope you have lovely day? Be aware you can be kept fully up to date with my posts by clicking on the "follow" button (just right of this post) that way you will never miss a post. Also you can find me on social media and those are also located on the right side of this post. Feel free to leave me comment, so I know you have been by. Until next time keep crafting and smiling. 


You may be interested in -