Showing posts with label WHSmith.. Show all posts

Wednesday, 24 May 2017

Purr-fect Friend | My Favorite Things Stamps

Hello there, well today I'm back again with second card to share, with me being a guess designer on My Mum's Craft Shop blog. Anyone that knows me well, knows I adore kitty cats and can spend hours and hours looking a cute cat videos on YouTube and Instagram, sad you may say? but I just love cats and their individual characters and just can't can enough of them. So with that in mind, I just had to make card with cats on.


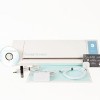
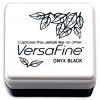
First I cut the A2 stitched panel from Neenah card using the silhouette cameo, next cut another stitched panel from sheet of 12 x 12 pattern paper that was from The Works which  is now sadly discontinued. Cut across the middle of the pattern paper with  a guillotine, adhered the pattern panel to the Neenah panel using double sided tape. Stamped You're' A Purrfect Friend on strip of lilac card from the MFT Cat-itude stamps, using versa fine onyx black ink and my DIY stamp tool. Adhere the strip just slightly above the middle of the card.


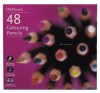
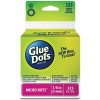
Next I stamped the cats on sketch paper and scan this using the direct scan function on the Silhouette, (This is direct scan and does NOT save the scanned image the computer and hence does NOT infringe any copyright as your not saving anything and are just using the cameo as pair of scissors to cut out the image) then trace the image with the trace tool with the silhouette software. To create die cut and then stamp the cat images and food bowl from the MFT Cat - itude stamp set using versa fine onyx black ink pad and of course my trusted DIY stamp tool..Definitely a must. Coloured in using WHSmith coloured pencils. Adhere the cat to the back with double sided tape and then other cat and food bowl with double sided foam tape. Adhered the panel to A2 US card blank using double sided foam tape. Added a few clear sequins using micro glue dots to adhered them.


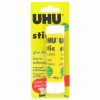
Interested in the products I've used, below is pre - prepared list for your convenience, all you have to do is click on the wording or the images to be taken to the stores I've used. No affiliate links used. 
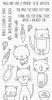

PIN ME

This is summary of the project below showing you all the views of the card, I'd love you to pin this over at Pinterest if you like it.   


Sunday, 26 March 2017

Amazing Mum to me | Handcrafted Gifts

Hello there, yes you might have already guessed what type of card I'm sharing today...yes it's Mother's Day card. I love to create that special card for my Mum and go that extra mile to make my Mum's day that bit more special.


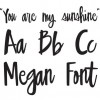
Created a 7 x 5 card blank by using one sheet of A4 black card, cut out one 7 x 5 and then cut out 7 x 6 and scored at one inch and applied two strips of strong double sided tape and adhered to two pieces together. Using the silhouette software, created a stitched panel just smaller that the blank card and placed sheet of blue card on cricut mat and cut out. Next I typed out "Amazing" sentiment using Megan font and placed black card on the same cricut mat and cut out two and cut another using silver glitter card. Finally created stitched circle and cut using neenah card on the silhouette.  


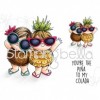
Stamped the Stamping Bella image on to the stitched circle using my diy stamping tool and versa fine onyx black ink then coloured in the image with colouring pencils, I decided to colour this to create a soft blend effect and then added a little Uni-ball Signo white gel pen to the sunglasses to add some shine. Using the silhouette software typed Mum to me using the same Megan font and printed on to tracing paper (no need for print and cut) and quickly poured over clear embossing powder (you can do this on any printer if your super quick) and heat set using heat tool. Cut down to strip and wrapped around the blue panel and adhere sticky tape to the rear. Placed the stitched circle on the panel just hanging off the right side adhering with double sided tape, cutting the remainder off the panel with scissors. Placed double sided foam tape to the back of the panel and adhered to the card panel.  


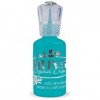
Stacked to two black Amazing sentiments with zig fine glue pen and finally adding the glitter Amazing sentiment on the top using the same zig fine glue pen. Then placed the sentiment just near the stitched circle but still near Mum to me sentiment, adhered this with Zig fine glue pen. Finished off with Tonic Nuvo drops and added a few clear AB sequins adhering them with micro glue dots. 


Interested in the products I've used, below is a list pre prepared for your convenience, click on the images or wording to be taken to the stores I've used. No affiliated links used.


I love to create handcrafted gifts for my Mum, so with this in mind I went out and purchased inexpensive frame from a local discount store and cut out a lovely heart felt sentiment out of silver glitter PVC vinyl on my silhouette cameo that was picked up in my local Home Bargains UK for 89p.


My Mum simply adores roses but instead of purchasing fresh roses, I decided to go for faux flowers and again it picked these up for £1.89. Found mini cream bucket that was purchased some time ago and cut some florist foam and placed the foam into the bottom of the tin and placed the faux flowers into the foam and wrapped the bouquet with cellophane. Also I think these will last awful lot longer than fresh roses.


Interested in the products I've used, below is a list pre prepared for your convenience, click on the images or wording to be taken to the stores I've used. No affiliated links used.


Personally I think there is nothing better than creating your very one gifts for the one's you love, has it means so much more than purchasing mass produce items from the high street. What do you think? Do you like creating handcrafted gifts?

PIN ME

This is summary of the project below showing you all the views of the card, I'd love you to pin this over at Pinterest if you like it.