Wednesday 24 May 2017

Purr-fect Friend | My Favorite Things Stamps

Hello there, well today I'm back again with second card to share, with me being a guess designer on My Mum's Craft Shop blog. Anyone that knows me well, knows I adore kitty cats and can spend hours and hours looking a cute cat videos on YouTube and Instagram, sad you may say? but I just love cats and their individual characters and just can't can enough of them. So with that in mind, I just had to make card with cats on.


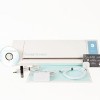
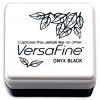
First I cut the A2 stitched panel from Neenah card using the silhouette cameo, next cut another stitched panel from sheet of 12 x 12 pattern paper that was from The Works which  is now sadly discontinued. Cut across the middle of the pattern paper with  a guillotine, adhered the pattern panel to the Neenah panel using double sided tape. Stamped You're' A Purrfect Friend on strip of lilac card from the MFT Cat-itude stamps, using versa fine onyx black ink and my DIY stamp tool. Adhere the strip just slightly above the middle of the card.


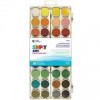
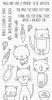
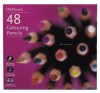
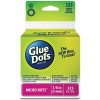
Next I stamped the cats on sketch paper and scan this using the direct scan function on the Silhouette, (This is direct scan and does NOT save the scanned image the computer and hence does NOT infringe any copyright as your not saving anything and are just using the cameo as pair of scissors to cut out the image) then trace the image with the trace tool with the silhouette software. To create die cut and then stamp the cat images and food bowl from the MFT Cat - itude stamp set using versa fine onyx black ink pad and of course my trusted DIY stamp tool..Definitely a must. Coloured in using WHSmith coloured pencils. Adhere the cat to the back with double sided tape and then other cat and food bowl with double sided foam tape. Adhered the panel to A2 US card blank using double sided foam tape. Added a few clear sequins using micro glue dots to adhered them.


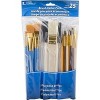
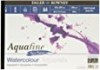
Interested in the products I've used, below is pre - prepared list for your convenience, all you have to do is click on the wording or the images to be taken to the stores I've used. No affiliate links used. 


PIN ME

This is summary of the project below showing you all the views of the card, I'd love you to pin this over at Pinterest if you like it.   


Friday 19 May 2017

Fabulous Foil | Artistic Confidence | Giveaway

Hello there, well I don't often have time to play and experiment as much as I would dearly like too, but last weekend there was some play time to spare and decided to experiment with my Loew Cornell Watercolor Cakes that I'd purchased earlier on this year (can you believe it's took all this time - life does seem to throw things at us and spare time does go out of the window.) 


Cut a stitched panel from watercolour card on my Silhouette Cameo. Chosen three pink colours from the Loew Cornell Watercolor set ( it had to be pink, you know me by now!!) spritz the watercolours with water from plastic spray bottle to get them moisten and then dampen the watercolour card first with a coat of water with wide brush and then brushed over with the paint, starting with the darkest pink and going down to the lightest. Spritz a little water over the panel and mopped away the excess water with a piece of kitchen roll. Mixed a little white paint with narrow brush from the same set and with my finger, I tapped the brush to creative splashes of paint.  


Spritz a little shimmer spray on tile and used a brush to create a sweep effect across the top half of the panel. Stamped hello friend from the W&W the big, the bold and the happy set using versa fine watercolour ink and my DIY stamp tool.  Pour over WOW bonding powder and heat set with heat tool to create a sticky bond then took a piece of gold foil and rubbed firmly over the sentiment, to create the foiled sentiment. (This technique comes out a little more rustic, but still looks very good and effective. These foils i've used were originally purchased last year and I forgot all about them...unbelievable I know, but I imagine this happens to us all!)  


Applied double sided foam tape to the back of the panel and adhered to black A2 US card blank that I made from sheet of black card and the big score board. To finish added a few gold sequins and adhered them with micro glue dots.

I have always loved being creative ever since I could remember, but when I attended secondary school, my artistic confidence took to a nose dive and at a all time low as a Art teacher actually commented that he thought I had no talent in Art, which I have to admit as stay with me even to this day and does effect my confidence when card making and  many of my cards have ended up in the bin, thinking they were no good. ( I realise this is naughty, but I when that doubt cloud comes over, it's hard to push it away)  

Giveaway

To say Thank You for your continued support, I'm giving this card away!! All you have to do is leave a comment below and I will randomly pick a winner. You will have until the 3rd June 2017 9.00am British Meantime. I will announce the winner soon after this time. Good Luck!!   


Interested in the products used, there is prepared list below for your convenience, simply click on the image or wording to be taken to the stores used. No affiliate links used.


PIN ME

This is summary of the project below showing you all the views of the card, I'd love you to pin this over at Pinterest if you like it.   


I know many of you have gone through a similar situation at school, has I've spoken about this on social media on how teachers shouldn't give negative comments in away that it strips a person of they confidence and often like me it goes on into their adulthood lives too. I would love to hear your comments on the this topic? Please do share your thoughts and comments?