Showing posts with label sequins. Show all posts

Monday, 7 March 2016

Happy Mother's Day | Recollections Papers


Hello all, well I hope you are having great day? I thought I'd share with you a card I especially created for my Mum on Mother's day, I wanted something that little bit special and decided to use the recollections papers from Recollections Southern Charm 12 x 12 set that I'd purchased a few weeks back and just thought these papers suited Mother's day perfectly.

On will the card, I started with card blank just slightly wider than A5 card (tent fold) then adhered a narrow strip of the sparkle pink stripe papers to the left hand side of the card. Cut down a piece of the vintage flower paper down to fit the front of the card and adhered narrow strip of gold glitter card to the left side with strong double sided tape. Added some funky foam to the back of the vintage flower paper with double sided tape. 


Taking a piece of tracing paper, that I cut to slightly wider to fit perfectly on the card front. Next using some cornflour for anti static, rubbed over the tracing paper and using the Winnie and Walter The big, the bold and the happy <----- click here clear stamps and perfect medium stamped the Happy Mother's Day then poured over distressed gold embossing powder, then heat set with heat tool. Wrapped the finished stripe around the card and applied double sided tape to the back. Applied double sided to the back of the funky foam and adhered to the card. 


Using the Silhouette Cameo, I cut three Butterflies from the Silhouette Library <---- Click Here using neenah solar white card then stuck them together one on top of each other with zig fine glue pen, then triple embossing the butterfly with the distress gold embossing powder. Adhere to the card using the same zig fine glue pen. For the finishing touches I added some wink of stella clear glitter pen to the pink flowers and added a few sequins using micro glue dots to adhere them. 


(Click on the images below to be taken to the stores when I purchased the items, No affiliate links) 
           

Thank you for passing by today and hope you call by soon, to be kept fully up to date with my posts, the easier way is to "follow" this blog and you can do this by clicking on the follow button just to the right hand side of this post, or you can use email and bloglovin, You can find me on social media and those links are also located to the right hand side of this post. Feel free to leave me comment so I know you have been by. Until next time, keep crafting and smiling.


You may be interested in -

Wednesday, 10 February 2016

Valentine's | Bebunni


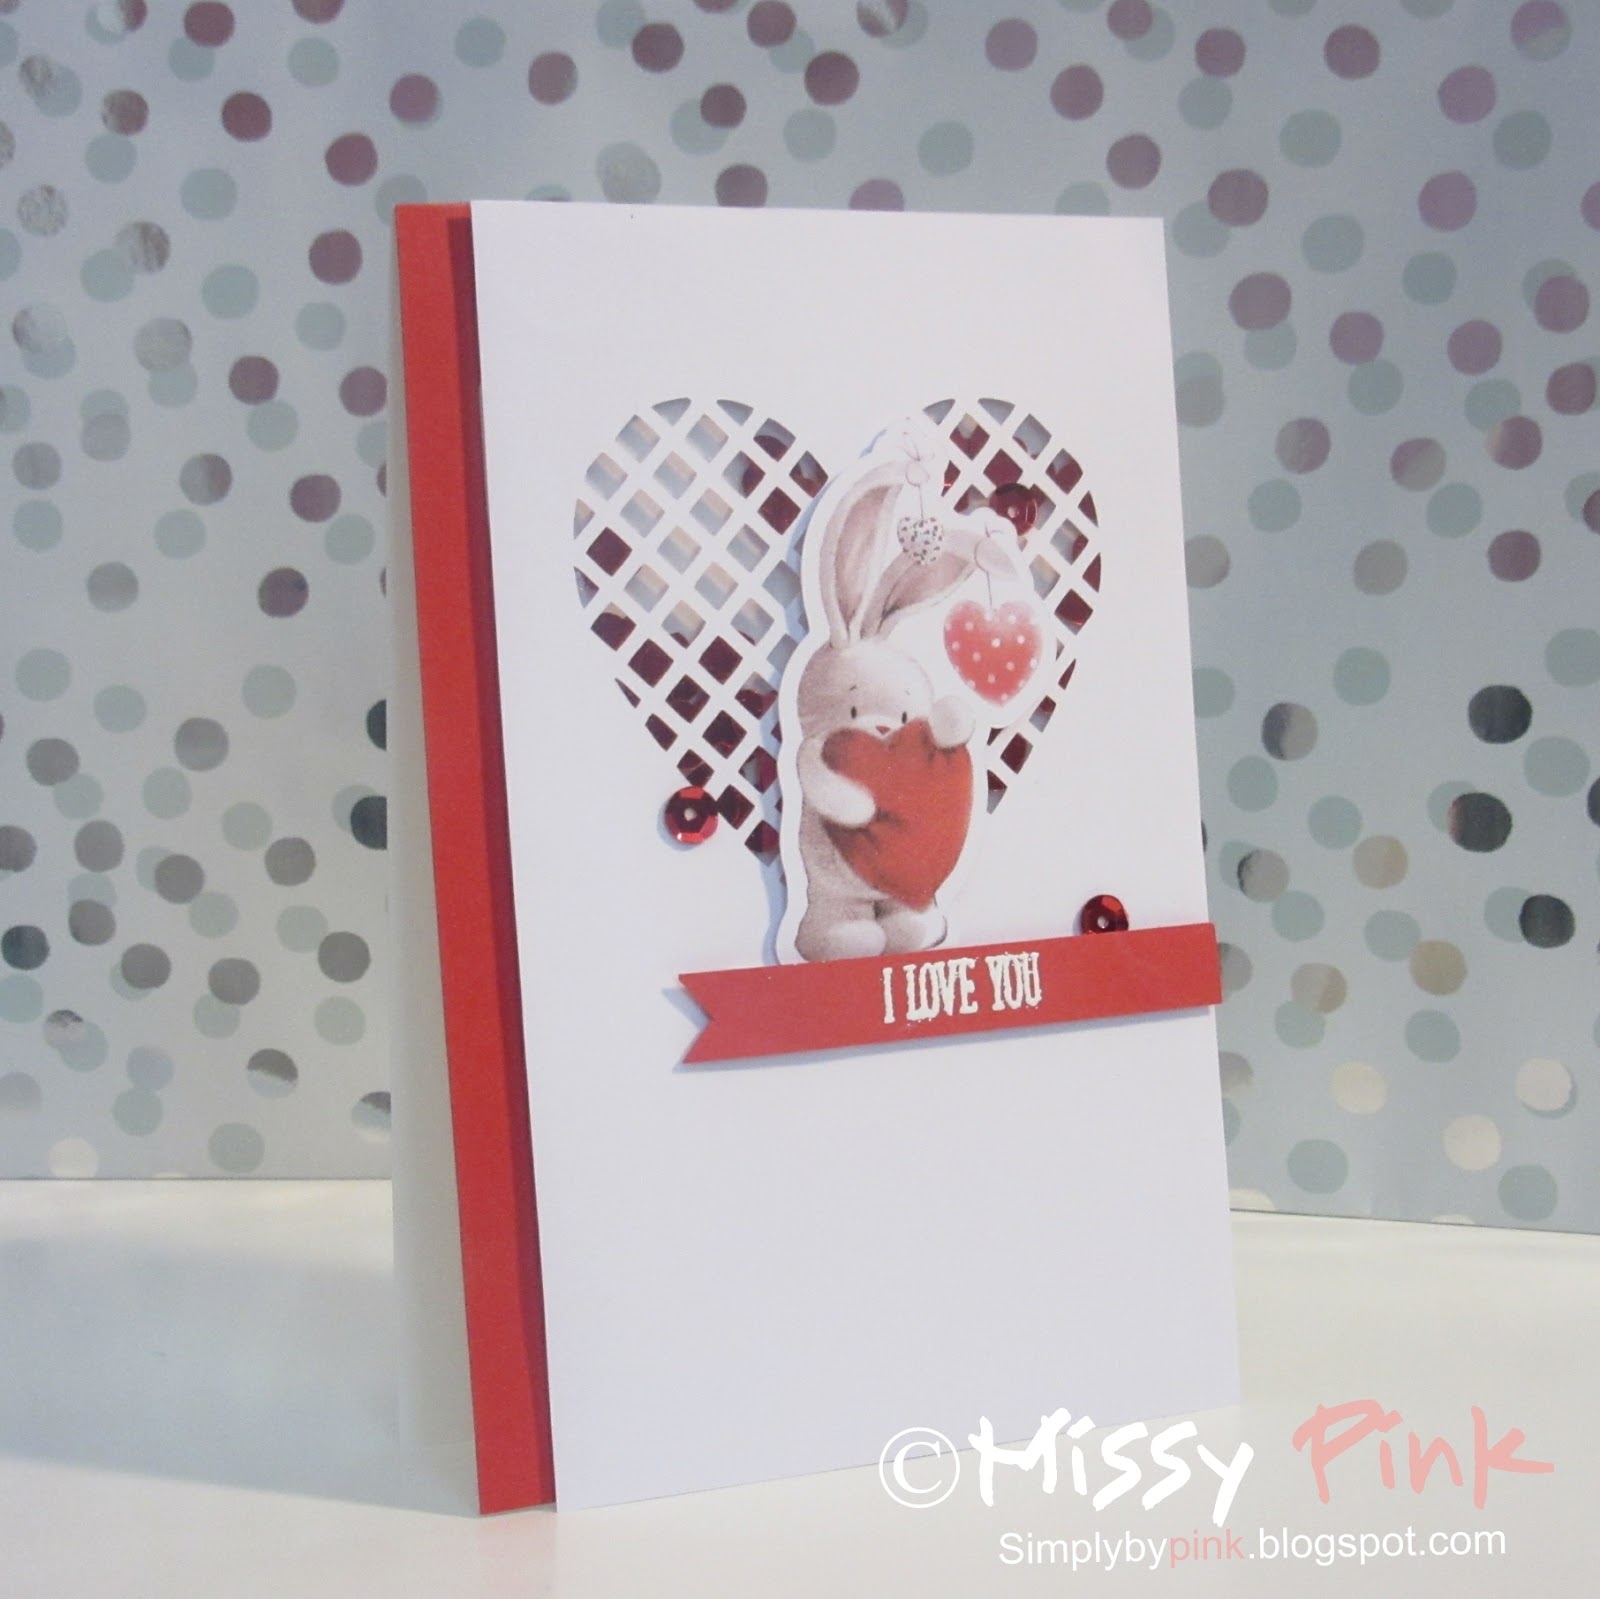
Hello all, well valentine's is almost around the corner, can you believe how fast February has arrived!!  I thought I'd create a card using Bebunni CD ROM that I purchased from Crafters Companion a while ago. Bebunni is certainly the perfect character for the valentine's, he is such cutie pie don't you think?

On with the card itself, started with A6 tent fold card, next I went Bird's Cards <------ Click here (Fabulous website where you can download beautiful cutting files for free, Birds Cards is brilliant resource site to go, when you need that special element to go on your card and they offer a superb angel policy for just personal use.) This one is the Lattice Heart and was cut using a piece of neenah solar white card and the Silhouette cameo machine, making sure I created rectangle shape so the heart stayed in the middle of the card. 


Then using Serif craft artist, I picked out the cute bebunni image from the CD Rom and using the cut out feature in SCA I managed to get the image of bebunni on his own, then created a offset in Silhouette and cut this out. I attached a small piece of acetate on the back of the heart die cut using strong double sided tape and added double sided foam to the top of the acetate to create a shaker card, added a few heart confetti and applied another piece of acetate for the top. Then added a stripe of red card down the left hand side of the card blank, adhere the matt to the card blank using double sided foam tape.      


Now attached bebunni to the middle of the heart and stamped  MFT "I love You" using perfect medium ink and acrylic block and poured wow bright white embossing powder over the top and heat set with a heat tool. Snipped a little arrow into the stripe of card and attached the card using double sided foam pads. For the finished touch I added a little wink of stella clear glitter pen to the heart and added three red sequins using micro glue dots.


(Click on the images below to be taken the place where I purchased the items, I do not use affiliate links) 


Thank you for visiting today, I hope you have lovely day? Be aware you can be kept fully up to date with my posts by clicking on the "follow" button (just right of this post) that way you will never miss a post. Also you can find me on social media and those are also located on the right side of this post. Feel free to leave me comment, so I know you have been by. Until next time keep crafting and smiling. 


You may be interested in - 

Tuesday, 1 December 2015

Altenew | For you


Hello all, I recently purchased some Altenew vintage flowers photopolymer clear stamps after seeing Lydia Evans on a shopping channel creating some beautiful designs. So I just had get my hands on them too. They arrived couple a weeks ago from Make the day special, but i've only just had the time to start playing with them. I must say, I did struggle to work out these stamps, but I got there in the end. I absolutely love these stamps and the results are pretty special.     


Started with sheet of Linen A4 card cut down to 20 x15 cm and folded with bone folder to the left side. Cut a matt layer of neenah solar white card slightly smaller than the card blank.  


Using the larger flowers, I stamped three heads scattered across the middle using the colour parchment (from colourbox ink set) then inked the second stamp layer in topaz colour and thirdly stamped the last layer in gold ink pad. Next I masked the flowers using post it notes, next stamped the small first layer of the small leaves with moss green colour and the next stamp layer with h green. Scattered three leaves in total, three seems to be the perfect number.  


I also did the same for the larger leaves using the same colours, added the small flower in between to hide any spaces using parchment colour. Using a heat tool in between each step so the ink is fully dried. Adhered this matt layer with double sided tape to blank card. Using Dymo embosser labelling machine, type out label "For You" and adhere the label to this card using double sided foam tape. Added a little sparkle to the small blossoms and the large heads with clear wink of stella pen. To finish I added some gold sequins and adhere them with micro glue dots.    


Supplies

(Click on the images below to be taken to where I purchase the items, I do not use affiliate items )

http://www.amazon.co.uk/Papermania-5-25-inch-Stamp-Block-Transparent/dp/B005OPO1RE/ref=sr_1_2?ie=UTF8&qid=1448821950&sr=8-2&keywords=acrylic+block

Thank you for passing by today and hope you visit again, please be aware you can be kept fully up to date with my latest posts and news by being a "Follower" and you can do this by clicking on the follow button just on right hand side of this post, or you can follow by email and bloglovin. Feel free to leave me comment so I know you have been by. Until next time keep crafting and smiling,


You may be interested in seeing this