Showing posts with label crelando card. Show all posts

Wednesday, 12 April 2017

Happy Birthday to you | Silhouette Cameo

Hello there, well what with feeling a little under the weather with what I call the anxiety cloud!. Yesterday was the first day in a while that I've actually felt like crafting and decided to give layered backgrounds a try.


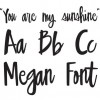
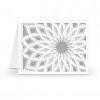
Started by creating A2 US card by cut down a sheet of grey A4 card down to 11 inch by 4.5 inch and creased a fold using the big score board and embossing tool. Opened the silhouette software and cut the three panels die that is the Lori Whitlock A2 stacking card element purchased from the silhouette store using white super smooth card. Then typed the word happy using Megan font again purchased from the silhouette store and cut three on the silhouette  


Stacked the three A2 panels on top of each other using zig fine glue pen, then added a strong double sided tape the near of the back panel and added a little zig fine glue pen to the finer ideas and adhered to the card blank. Stacked Happy in the same way as the panel using zig fine glue pen. Type birthday to you in word using Backtalf serif BTN font and print this out on piece of super smooth card. Cut the sentiment down to stripe and adhere the Happy just right to the sentiment using zig fine glue pen.


Added double sided foam tape to back of the white sentiment stripe and adhere to middle of  the A2 card blank and to finish added a three AB sequins and to adhere them I used micro glue dots.


Interested in the products used, I've prepared a list below for your convenience just click on the picture or the wording to be taken to the store I've used. No affiliate links are used.
I really enjoyed creating this card and allowed me to be creative again after having that dreaded anxiety cloud hanging over me. Hoping I will get into the swing of things now here's hoping anyway. Do you find crafting helps you thought the bad times or helps your when your unwell? 

This will be entered into the following challenges

PIN ME

This is summary of the project below showing you all the views of the card, I'd love you to pin this over at Pinterest if you like it.   


Wednesday, 15 February 2017

Guest Designer at My Mum's Craft Shop | February 2017

Hello there, today I have the absolute pleasure to be Guest Designing at My Mum's Craft Shop for the month of February, Kitty who is the owner of My Mum's Craft Shop is such super talented designer and her online shop is stocked with such array of choice for your crafty needs including the big stamp brands from the USA, do pop on by and take look as it's definitely worth a visit. When Kitty asked me to be guest designer for February I was utterly delighted and couldn't say yes quick enough.   


Started with grey A2 US card blank folded at the top. Created a stitched rectangle panel (slighter smaller than the card blank) within the Silhouette Studio Software, place a sheet of neenah solar white card on cricut mat and cut out the panel using the Silhouette machine. Using my diy stamp tool, I stamped the smaller cat from MFT Cat-itude stamp set first with Versafine onyx black ink, then stamped the same image on to piece of sticky note and fussy cut out to create a mask and placed this over the original stamped image. 


Then stamped the larger cat just to the side of the little cat. Coloured in the image with WH Smith artist quality colouring pencils and created a soft scene around the two cats to make the cats look more grounded. Applied double sided foam tape to the back of the panel and adhered to the card blank. Took a strip of grey card and rubbed over the card with cornflour (anti static) and using the "You're A Perrfect Friend " sentiment from MFT Cat-itude stamp set, stamped it onto the strip of card using Versamark Watermark stamp pad, poured over WOW bright white embossing powder and heat set with heat tool.  


Applied a strip of double sided foam tape to the back and adhered this just right of the cats. Finally added a few iridescent sequins adhering them with micro glue dots.

I simply adore cats and I'm always watching those cute cat videos on YouTube, Do you have a love for cats too?. Thank you to the lovely Kitty for choosing me to be a guest with her and her super talented design team. 


Interested in the items, click on the images or pictures below to be taken to those stores used. No affiliate links are used. Products marked with asterisks were kindly given to me for guesting at My Mum's Craft Shop.

Monday, 26 December 2016

Make Your Own DIY Embossing Folder | Silhouette Cameo | Recycling

Hello there, well many of us love embossing folders don't we? but I decided to have ago at making my own using my Silhouette Cameo. These are also easy on the purse strings and that always comes in handy doesn't it? Anything that allows me to create on the spot is always a winner for me.


To start off you will need cereal packs that you would usually pop in your recycling bin, this is chipboard on budget and is such a handy tool to have in your crafty stash. I have a big bag of cereal boxes in my craft space that I've collected over so many years and it's overflowing too.


Using the silhouette cameo I placed the cereal packet on a cricut mat and cut two panels ever so slightly bigger than A2 card blank and then took a element that was purchased from the Silhouette Store and cut that from the same cereal box material. 


To make the folder, applied four strips of sellotape to the top edge then adhered the positive cut out to one side of the folder with zig fine glue pen then placed the individual negative strips into the gaps then apply a little zig fine gen pen to the back of the strips and carefully close the folder and press firmly, then open out the folder and that's it done. I have Cuttlebug machine and used two B plates and my A plate with a piece of cereal box material on top of the folder as shim and piece of pink card in the folder and found this worked perfectly, these would work with all machines too, you would just need to find what works better for your machine. As you will see from the finished result, it works a treat with a crisp embossed effect just like a normal embossing folder.

Enjoy the rest of your day and the holiday season. 


Interested in the products used, click on the images below to be taken to those stores, No affiliate links used.