Sunday, 7 February 2016

Collective Discount Craft Haul


Hello all, well I'm bring you craft haul today, I've recently been looking around many shops to see if I could get some little crafty treats that wouldn't harm the bank balance, I do always keep my eye out for discounts and bargains and do love saving a few pennies in the process.   


The first item I picked up was in Homesense <---- click here, believe it or not I'd never been in Homesense before and I am so glad I did, as they do stock some lovely craft items for really good price. I personally love that they do stock quite a bit of the American brands that can be difficult to get in the UK.  (Homesense is apart of the TKMaxx brand family, so do check out your TKMaxx too) 

When I set my eye the Recollections - Southern Charm 12 X 12 paper pad I was hooked and just had to purchase it and at only £6.99 it was a real bargain as they do retail at much higher price if you can find them in the UK. There is beautiful array of papers and many are glittered too which I just love. I have tried them out already and they do cut well and work fabulously in Silhouette Cameo.

Next is from B&M UK <------- Click here  I regularly check out this store as they do have some really good craft supplies, I love their glitter card but they don't always have it in stock, so I always get plenty when it's available. It retails at £1.49 and should be £3.99.

Another favourite is pound stores and it's definitely worth popping in when you can, as they are always adding new lines. These were purchase from Poundworld <----- Click here  Glitter foam EVA 10 sheets, really good quality and with such lovely sparkle. Also they was had the similar glitter card to B&M but in slightly different colours. I am always excited when I see new items in the pound stores, as when your on budget like most of us are, it allows you to freshen up your craft stash without spending too much. All in all it's only costed £13.97 for all these treats.


(Click on the images below to taken to the shop links, I do not use affiliate links)


Thank you for visiting my blog today and hope you visit again soon, be sure to click the follow button on the right hand side of this post and this will keep you fully up to date with my latest posts, or you can use bloglovin and email. You can even find me on social media and those links are located again on right hand side of my blog post. Feel free to leave a comment, so I know you have been by. Until next time keep crafting and smiling.


You may be interested in -
 

Monday, 1 February 2016

Altenew | Happy Birthday Mum


Hello all, well I have a very special card to share with you today, I designed this especially for my Mum's birthday and I do like to create something a little bit special for her. You have to spoil your Mum on her birthday!!....of course!! Also I had to use the Altenew stamps as my Mum absolutely loves the concept of them.

On with the card itself, I started with A5 card (tent fold) and cut a strip of the blue card and embossed it using embossing folder and ran it through cuttlebug machine, I had to do this in two parts as the embossing folder was only 6 x 6 folder. Next stamped the flowers on neenah card using paintbox multi colour inks and acrylic stamp ( colours used - Seaglass, mint , cyan for the flowers and French green, Moss green) 

Using the silhouette cameo software Direct to scan <-------- click here (this is where you can scan image without saving it to the computer and hence not infringing any copyright - just using the machine as pair of scissors ) I traced the image and got the silhouette machine to cut out the offset around the image using 250gsm white card from Active paper <----- click here. Stamped Mum just to bottom right of the flower imagine and using double sided foam tape I adhered the offset to the stamped flowers matt, making sure the offset was in the perfect position for the image. 


Then adhere the matt to the blank card using double sided tape, using the CB Mini messages stamp, I stamped "Happy Birthday" on narrow strip of neenah card and adhere to the card using collall 3D glue gel. Finished with a sequins and adhere them using micro glue dots. 


(Click on the images below to be taken to where I purchased the items, I do not use affiliate links)


Thank for visiting my blog today, so hope you call back again soon. Please do follow my blog via the "follow" icon (just right of this post) to be kept fully up to date with my latest posts, or you can follow using email and bloglovin. You can even catch me on social media -- check the links to the right of this post. Feel free to leave me comment, so I know you have been by. Until next time, keep crafting and smiling.

This will be entered in the following challenge(s)
Simon says stamp -- Ray of sunshine Monday Challenge


You may be interested in 

Monday, 18 January 2016

Homemade Stamping Tool | With the help from Create in Spain Youtube


Hello all, Well as any of you been struggling with stamp positioning? I certainly have indeed and the most annoying of all is stamping and missing part of the stamp image! so I needed a tool that would help me with my problem. I know there are several stamp positioning tools out there but with funds being over stretched in January, I just could'nt afford the one I wanted so I started looking out for alternative. I was over the moon to find a wonderful blog called Create in spain <------ click here where the blogger created her very own tool. So I decided to give it a go and to my surprise it worked just perfectly     

(Regarding Copyright ---- I have made this for myself for my own personal use, I am not selling anything and not standing on anyone's toes and not copying anyone's business. I would love to own a proper stamping tool one day but for now I have to manage with this handmade one.)


All the materials I managed to find on eBay and local Home bargains store, all are quite easy to get hold of.


I printed out the grid paper from my printer that allows you to print out office sheets and laminated it and used removable adhesive, so any paper or card would attach.

I have attached the video of the lady who inspire me to create mine, so hope you find it of some use as much as I did.


Thank you for passing by my blog today and hope you visit again, you can be kept fully up to date with my posts by clicking on the follower button -- just right of this blogpost, you can even follow by bloglovin or email. Don't forget you can find me on social media too and those links you can find just to the right of this post too. Feel free to leave me comment so I know you have been by.  Until next time keep crafting and smiling.


Sunday, 17 January 2016

Mulberry Wood CD Crafting | Happy Birthday


Hello all, I hope you are all enjoying your weekend? So hope you all know about my new blog address by now and you still continue to follow me. Please make sure you add my new blog address to your favourite's bar and if you follow via bloglovin, you will have to re follow too. 

On with the card itself, started with A6 card folded to make a tent fold, next I cut a piece of white card just slightly smaller than the card blank and scored lines across with a boxer board and embossing tool, leaving a couple of centimetres at the top.


Next cut a thin strip of the pattern paper from the Mulberry Wood CD Rom, and adhere this with double sided tape to behind of the lilac card that I cut down to fit the bottom half of the card. Then adhere this to the card blank using double sided tape.


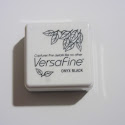
Stamped Happy Birthday (from Clearly Besotted) using acrylic block and versafine onyx black ink, just to the right bottom corner of the card. Using silhouette cameo software I pulled in the image of the bear from the Mulberry Wood CD ROM and created a circle which I cropped the image down and added the Sarah Hurley Silhouette Store die element to finish, printed and cut out and adhere EVA foam to the back of the die element and attached the middle of the card using the same double sided tape. To finish I added a few sequins which were adhered with micro glue dots. 


Supplies 


(Please click on the images below to be taken to where I purchase them from, I don't use affiliate links)


Thank you for passing by today and hope you call back soon, be aware you can be kept fully up to date with my latest posts by following my blog, you can do this by clicking on the follow button on the right hand side of this post, or you follow via bloglovin and email. You can also catch me on social media which are allocated on the right side of this post. Feel free to leave me comment so I know you have been by. Until next time keep crafting and smiling.


You may be interested in -