Sunday, 27 December 2015

Important notice to all followers

Hello all, so I hope all of you had peaceful Christmas and wish you all the best for 2016!! I'm here today not with card unfortunately but to let you know there will be important changes to do with the Google friend connect and Google have said it with come into effect on the 11th January 2016.


"In 2011, we announced the retirement of Google Friend Connect for all non-Blogger sites. We made an exception for Blogger to give readers an easy way to follow blogs using a variety of accounts. Yet over time, we’ve seen that most people sign into Friend Connect with a Google Account. So, in an effort to streamline, in the next few weeks we’ll be making some changes that will eventually require readers to have a Google Account to sign into Friend Connect and follow blogs.

As part of this plan, starting the week of January 11, we’ll remove the ability for people with Twitter, Yahoo, Orkut or other OpenId providers to sign in to Google Friend Connect and follow blogs. At the same time, we’ll remove non-Google Account profiles so you may see a decrease in your blog follower count.

We encourage you to tell affected readers (perhaps via a blog post), that if they use a non-Google Account to follow your blog, they need to sign up for a Google Account, and re-follow your blog. With a Google Account, they’ll get blogs added to their Reading List, making it easier for them to see the latest posts and activity of the blogs they follow."


Please do take a look at this and make sure you follow using an active google account email address you keep up to date with my latest posts, I would hate to lose any of you. Thank you..




Sunday, 20 December 2015

Who's been shopping | Craft haul


Hello all, Hope you are having lovely weekend? thought i'd bring you craft haul today as i've not done a craft haul in while. I have to say that a couple of the items I did purchase a few weeks back but thought I would add them in to this craft haul.

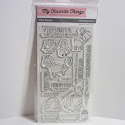
First and foremost I absolutely love (MFT) My Favourite Things and have followed them for sometime but never had any of their products, so I decide to treat myself to couple of things and I am so glad I did.. Only thing is I may have to purchase some more at some point. So wish I could hit the lottery as I'd buy most of their range (I wish hey!) I can dream, I suppose!!. 


I decided to go for "The whole herd" set of sets because the farm animals were so sweet and would be so ideal for children and with the witty sentiments they would also suit adults too. I just can't wait to have play with these.. The second stamp I purchased was the bold diagonal background stamp, which red rubber (one of my favourites) which is renowned to be highest quality. I don't actually own any background stamps so I took the leap and invested in some as I've seen a fabulous technique used by Amy R of Prairie Paper and Ink and so want to try it for myself. Please do click on Amy R name and see the wonderful technique for yourself.. using value brand (kids) watercolour paints. Both sets of stamps were purchased from Make The Day Special.

On to the Watercolours, the first set (watercolour cakes) was purchased from Home bargains in UK for incredible price of 79p..can you believe!! and the other set it from Poundworld..just can't wait to get playing with them both and of course I'll let you how I get on.

Do you try value brands, or kids brands in your craft space? My advice is give it ago and you have nothing to lose and you could find the perfect technique and most of all it's not costed you very much.
(Just click on the images below to be taken where I purchased the items from, I do not use affiliate links)


I would just like to say to wish all my friends, followers and supporters "Happy Holidays" and hope you have happy and healthy New Year . I will be back soon with my latest makes as I usual do. 
Thank you so much for passing by today and hope you visit again very soon. Please be aware that you be kept fully up to date with my posts by being a "follower" just click on the follow button on right hand side of this post, or you can follow by email and bloglovin. You can also catch me on social media too. Feel free to leave me comment so I know you have been by. Until next time keep crafting and smiling.


Saturday, 12 December 2015

Forever Friends | Fabulous Friends


Hello all, well it's been rain, rain followed by even more rain here. It's been like this for ages and it does not seem to change. Oh well it's winter and you expect bad weather in the winter. I decided to spend some time in my crafty space this afternoon...certainly the best place to be than being in the rain. Well I was looking through my clear stamps box and found these super cute Forever Friends bears, so just had to use them, I simply adore these cute little bears and have done since I was little. Not met anyone as yet who doesn't dislike them, well how could you.  


On with the card itself, started with A4 white card cut down to 29cm x 10.5cm and folded with bone folder to make tent fold card. Cut down piece of Coredinations core essentials cardstock slightly smaller than the card blank and lightly embossed diagonal lines with the Crafter's Companion - The boxer board and embossing tool. 


Adhere this to card blank with double sided tape. Next using Silhouette Cameo, I cut the nested stitched rectangle using neenah solar card and die element was purchased from Sarah Hurley's Designs at the Silhouette store. Stamped the Forever Friends image on the bottom right of the nested stitched cut out with Memento black ink pad and acrylic block.  

Coloured in the image with WHSmith Artist Colouring Pencils, once finished I cut some EVA fun foam to fit to the back of the matt and adhere with doubled sided tape. Then adhered the layer to the card blank using the same double sided tape. 


Using Perfect Medium I stamped CB "Fabulous Friend" on some matching core'dinations card (rubbed the card with a little baby powder first, to stop any static) poured over Wow opaque white embossing powder and heat set with a heat tool. Cut the strip down and adhere to the card using Stix2 5mm double sided foam squares. Added a little sparkle to the hot cross buns with clear wink of stella pen and to finish added a few sequins with micro glue dots.

I thought this was super cute design and love the fact that the bear is holding hot cross buns, to those who don't know what they are, over in the UK they are famously eaten at Easter, but can be eaten at any time..They are lovely sweet buns that are lovely toasted and with spread of butter and jam..yummy. Oh it's made me hungry now talking about hot cross buns, I could just eat one now with a lovely cup of tea...what bliss. 


Supplies

(Please click on the images below to be taken to where I purchased the items, I do use affiliate items)


Thank you ever so much for passing by and please do visit soon, make sure to click on the follow button on right hand of this post, to kept fully up to date with my latest posts or you can follow via email and bloglovin. Don't forget you can find me on social media pages too. Feel free to leave me a comment so I know you have been by. Until next time keep crafting and smiling.


You may be interested in 

Tuesday, 1 December 2015

Altenew | For you


Hello all, I recently purchased some Altenew vintage flowers photopolymer clear stamps after seeing Lydia Evans on a shopping channel creating some beautiful designs. So I just had get my hands on them too. They arrived couple a weeks ago from Make the day special, but i've only just had the time to start playing with them. I must say, I did struggle to work out these stamps, but I got there in the end. I absolutely love these stamps and the results are pretty special.     


Started with sheet of Linen A4 card cut down to 20 x15 cm and folded with bone folder to the left side. Cut a matt layer of neenah solar white card slightly smaller than the card blank.  


Using the larger flowers, I stamped three heads scattered across the middle using the colour parchment (from colourbox ink set) then inked the second stamp layer in topaz colour and thirdly stamped the last layer in gold ink pad. Next I masked the flowers using post it notes, next stamped the small first layer of the small leaves with moss green colour and the next stamp layer with h green. Scattered three leaves in total, three seems to be the perfect number.  


I also did the same for the larger leaves using the same colours, added the small flower in between to hide any spaces using parchment colour. Using a heat tool in between each step so the ink is fully dried. Adhered this matt layer with double sided tape to blank card. Using Dymo embosser labelling machine, type out label "For You" and adhere the label to this card using double sided foam tape. Added a little sparkle to the small blossoms and the large heads with clear wink of stella pen. To finish I added some gold sequins and adhere them with micro glue dots.    


Supplies

(Click on the images below to be taken to where I purchase the items, I do not use affiliate items )

http://www.amazon.co.uk/Papermania-5-25-inch-Stamp-Block-Transparent/dp/B005OPO1RE/ref=sr_1_2?ie=UTF8&qid=1448821950&sr=8-2&keywords=acrylic+block

Thank you for passing by today and hope you visit again, please be aware you can be kept fully up to date with my latest posts and news by being a "Follower" and you can do this by clicking on the follow button just on right hand side of this post, or you can follow by email and bloglovin. Feel free to leave me comment so I know you have been by. Until next time keep crafting and smiling,


You may be interested in seeing this